How to Let Your VA Send Emails from Your Gmail - Without Sharing Your Inbox
If you want your Virtual Assistant (VA) to send emails on your behalf—whether for bulk campaigns or personalized, manual outreach—you don’t have to give them full access to your Gmail inbox. Instead, you can securely share just the ability to send emails, using Gmail’s SMTP (Simple Mail Transfer Protocol) credentials. This guide will show you how to generate disposable credentials and how your VA can use them with a tool like Semi-Blast Email Client to send templated or manual emails, all without ever seeing your private messages.
Part 1: Getting Disposable Gmail SMTP Credentials
Are you using Gmail as part of Google Workspace (formerly G Suite) for your business or organization? If you access Gmail through your company or organization’s Google Workspace account, you should follow this guide for Google Workspace users for setting up the SMTP server.
Step 1: Enable 2-Step Verification
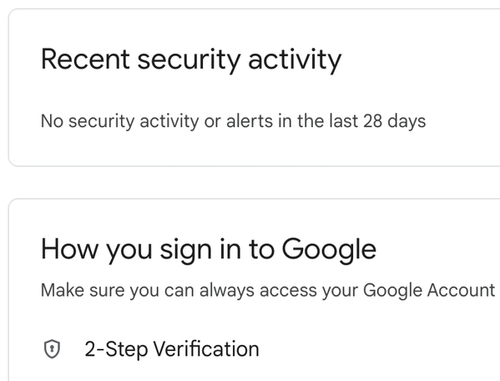
- Go to your Google Account Security settings.
- Under "How to sign in to Google," enable 2-Step Verification if you haven’t already.
Step 2: Generate an App Password
- In the search bar, search for "App passwords" (it appears after you enable 2-Step Verification).
- Enter a name for the App Password. You can use "Gmail SMTP" as the name.
- Click "Create".
- Copy the 16-character password, as you won’t see it again!
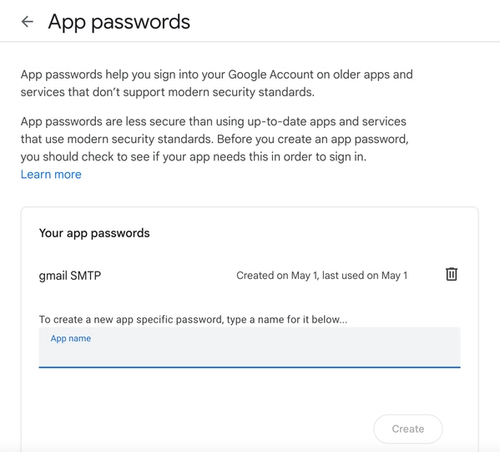
Note: This password is disposable. If you ever want to revoke your VA’s access, just delete this app password.
Step 3: Note Your SMTP Settings
- SMTP Server: smtp.gmail.com
- Port: 465 (SSL) or 587 (TLS)
- Username: Your full Gmail address (e.g., your_email@gmail.com)
- Password: The app password you just generated
Part 2: How Your VA Can Send Emails Using Semi-Blast Email Client
With your SMTP credentials, your VA can use a tool like Semi-Blast Email Client to send emails on your behalf with templates (either in bulk or one by one) or without templates.
Step 1: Set Up the Account
- Open Semi-Blast Email Client and click "Sign in" to create an account or sign in if you have one.
- Go to the account settings or the initial setup page by clicking on your avatar or on the icon with the first letter of your name.
- In the opened menu, click on the "SMTP details" menu item and fill the fields like this:
- SMTP Server: smtp.gmail.com
- Port: 587
- Secure (SSL/TLS) ✓
- Username: Your Gmail address
- Password: The app password (see Step 3 of the Part 1)
- Click on "Save Settings" and close the dialog.
Step 2: Sending the Emails
Manual Email Sending
Your VA can start writing and sending emails right away by using the widget on the right side of the main window of Semiblast application.

Automated or Semi-automated Email Sending
For automated or semi-automated mode you need to either load a template or a CSV/Excel file containing email data. If you already have a template and you upload a data file, you will be requested to map columns to template variables, so that the application would know how to fill the template variables. On the other hand, if you upload a spreadsheet without first uploading a template file, the columns will be used as template variables and the types of the templates will be decided by the data in their cells.
Upload a YAML template
Uploading a YAML file is the way to go if you want to send templated emails one by one or if you want to dictate a template for all kinds of email data files that you will upload to send later.
Create and upload a YAML template defining your email’s body template and the variables (e.g., website url, flags for enabling personalized messages, etc.). In order to get an idea of how the YAML file should look like, you can download a template file by clicking the "Download a simple template file" button.
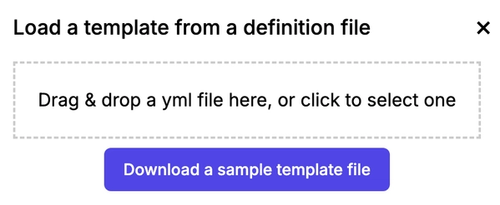
After modifying the file to your needs, you can upload it using the same dialog. The template will be available for editing on the right side of the widget.
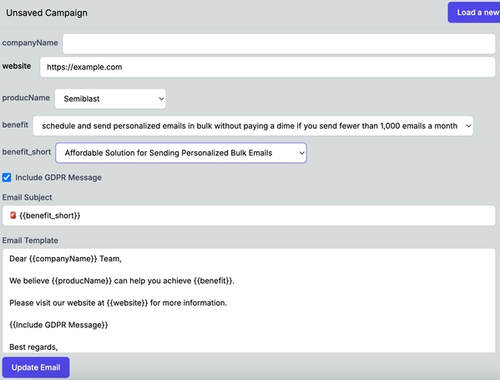
After this step, your VA can change the template variables for each email and click the "Update email" button. This will fill the subject and body of the pending email. After reviewing that the template is okay and the variables are loaded perfectly into the templates, the VA can hit the "Send" button. This will send the email and the next email will be formed from the templates.
This is a great way to test templates, to check open rates, conversion rates, etc., before going to automated mode. For automated mode, you need to have a spreadsheet with email addresses and with all the required template variables. The next section will talk about how to upload a spreadsheet and how to use it.
Upload a CSV/Excel Spreadsheet
You can upload it by clicking "Load a template and data from an xlsx, csv file" or "Load data from an xlsx, csv file" depending on whether you have a loaded template already or not.
If you don't have a spreadsheet with data and you want to get inspiration on how to fill it, you can download a sample file by clicking on the button at the bottom of the dialog.
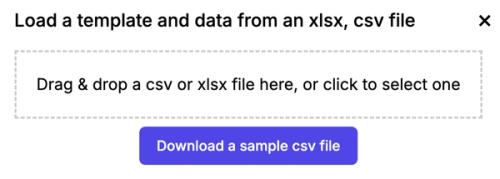
After uploading the file, you will be asked to map spreadsheet columns to the template variables if you have an uploaded template file already.
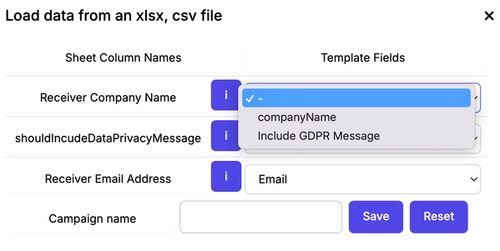
Or if you are starting with a clean sheet, oh sorry, if you are uploading a spreadsheet without having a defined template, you will need to specify the types of the columns in this dialog.

Note that in either case, if you don't specify the recipient address column, you will not be able to bulk send emails. You can only send one by one because your VA will need to fill email addresses before sending. You will also need to have non-empty body template and subject template to be able to send the emails in bulk.
Sending Emails loaded from a Spreadsheet
When emails can be sent in bulk, the following buttons will be visible in addition to the "Send" button.

The app will generate personalized emails for each row in your data file, using the templates and variables.
Your VA can review and send each email one by one, ensuring a personal touch and avoiding spam filters. Send operations will also fill templates with the next row's data, and will populate the recipient email address, the email subject, and the body. So, in most cases, the VA will review the resulting texts and will hit the "Send" button. Easy task, isn't it?
Not only can the VA improve the subject and the email body for the current email to be sent, but they can also modify the templates so that the upcoming emails can be generated with the changed template.
After the templates are polished, the rest of the rows can be bulk sent or blasted with one click. Of course, the blasting can be done from the first row.
For this, it makes sense to check all email texts before hitting the "Blast" button. That's what the 'Dry Run' feature is for. When you or your VA click on the "Dry Run" button, it will download a report file containing the email subject, body, and recipient's email address for each row of the originally uploaded spreadsheet.
You can manually check the rows for error patterns like multiple whitespaces, no whitespaces between words, unresolved template variables, etc. After fixing the input spreadsheet, the way it is mapped, and the templated texts, you can continue dry sending the emails. When you are completely happy with the result of the "Dry Run", you can hit the "Blast" button. All emails will be sent with the configured delay. You can leave the app and monitor the sent emails and reply to potential replies within your Gmail inbox.
Step 3: Revoke Access When Needed
If you ever want to stop your VA from sending emails, just delete the app password in your Google Account’s "App passwords" section. No need to change your main password or worry about inbox privacy.
Why This Method Is Safe and Efficient
- No Inbox Access: Your VA can’t read, delete, or organize your emails—only send them.
- Easy to Revoke: App passwords can be deleted at any time, instantly cutting off access.
- Professionalism: Emails are sent from your real address.
- Flexible: Works for both bulk campaigns and manual, personalized outreach.
By sharing only your Gmail SMTP credentials (via an app password), you empower your VA to handle your email outreach efficiently and securely—without ever compromising your privacy.
